When you’re applying to dozens (or hundreds) of roles, the job search turns into a pipeline problem: lots of inputs, unclear outputs, and enough “waiting” that it’s easy to lose track of what you did, when you did it, and what you should do next.
A job application tracker in Excel solves the messy middle: follow-ups, interview stages, recruiter names, and which resume version you used—so you’re not relying on your memory (or a chaotic inbox search).
A few data points underline why tracking helps:
-
98.4% of Fortune 500 companies used a detectable ATS in 2024, according to Jobscan’s research—so your application is often entering a system where status updates can be delayed, automated, or nonexistent.
Source: Jobscan, ATS usage report — https://www.jobscan.co/blog/fortune-500-use-applicant-tracking-systems/
Confidence: Medium (credible industry source, but not independently replicated in this guide). -
Average time to fill fell from 48 days (2023) to 41 days (2024), per SHRM—hiring cycles are long enough that follow-up timing matters.
Source: SHRM — https://www.shrm.org/topics-tools/news/talent-acquisition/recruiters-express-optimism-for-2025
Confidence: Medium (high credibility publication; metric is “time to fill” across employers). -
44% hear back within a couple of weeks, 37% within one week, and <4% within one day, per Indeed—so waiting is normal, but you still need a system so you don’t miss your follow-up window.
Source: Indeed — https://www.indeed.com/career-advice/finding-a-job/how-long-should-you-wait-to-hear-back-about-a-job
Confidence: Medium (self-reported survey data; useful for expectations). -
In BLS data, jobseekers who had at least one interview had about a 37% chance of having received a job offer (in the study’s context/time window).
Source: U.S. Bureau of Labor Statistics — https://www.bls.gov/opub/btn/volume-9/how-do-jobseekers-search-for-jobs.htm
Confidence: High (primary government source). -
From the employer side, CareerPlug reports employers received ~180 applicants per hire on average in 2024—high volume contributes to slower responses and more “ghosting.”
Source: CareerPlug — https://www.careerplug.com/recruiting-metrics-and-kpis/
Confidence: Medium (credible benchmarking report; varies by industry and methodology).
In this guide, you’ll learn:
- The best Excel columns for a job application tracker (and which ones are overkill)
- How to add drop-down statuses so your data stays clean
- Formulas to auto-calculate follow-up dates and highlight “overdue”
- A quick dashboard to see interviews, response rate, and which sources work
- When to stick with Excel—and when a job tracker tool is worth it
What is a job application tracker in Excel?
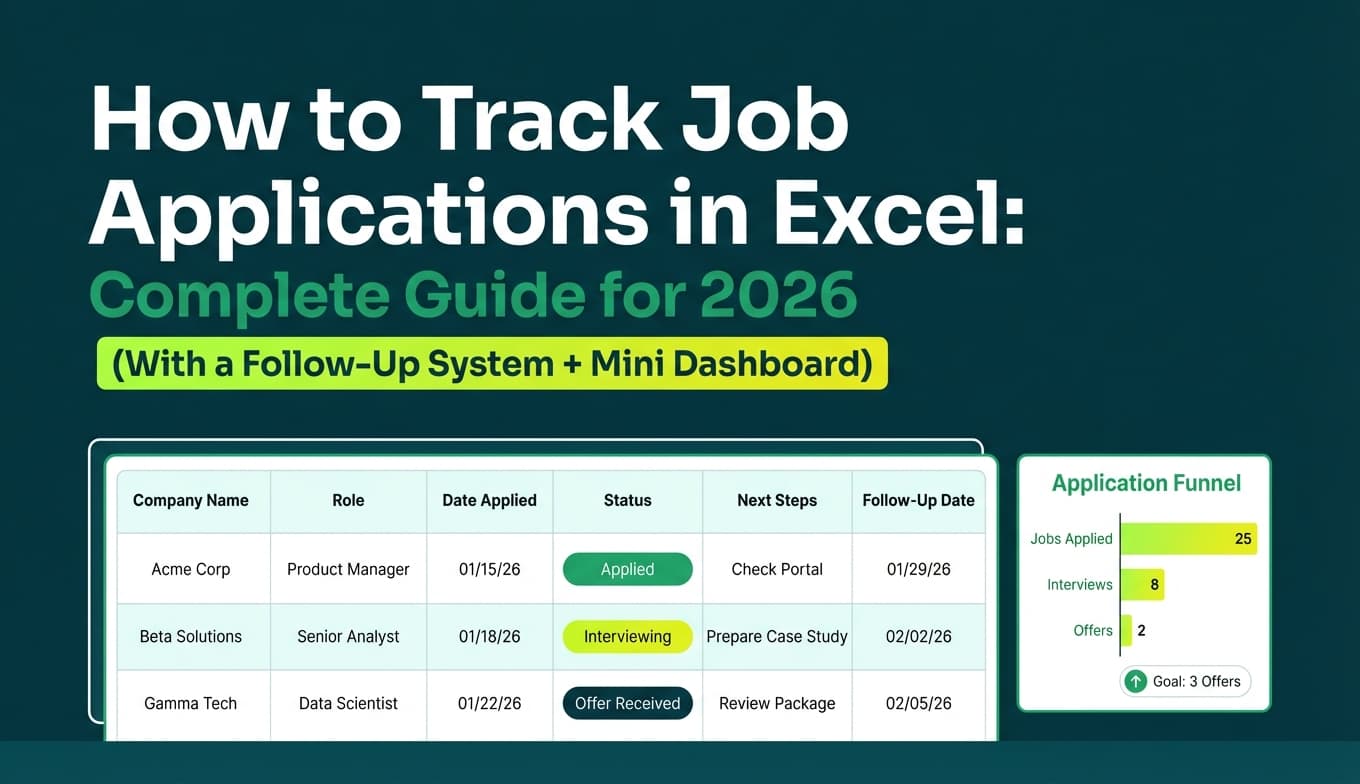
A job application tracker in Excel is a spreadsheet that functions like a lightweight CRM for your job search. Each row is one role (or one opportunity), and each column captures information you need to take action and make decisions—like when to follow up, which resume you used, and where the opportunity came from.
It’s not about “being organized.” It’s about answering these questions instantly:
- Did I already apply to this role?
- What stage am I in?
- Who do I contact (and how)?
- When should I follow up?
- Which resume version got interviews?
Why tracking matters in 2026 (and why your inbox isn’t enough)
Relying on your email inbox breaks down fast because:
- job postings get removed, but your tracker can keep the link and details
- companies send automated emails with vague subjects (“Update on your application”)
- different roles at the same company blend together
- you can’t easily see patterns (e.g., “referrals lead to interviews; job boards don’t”)
When ATS usage is widespread (see Jobscan stat above), it’s even more important to keep your own record—because the “system” isn’t built for the candidate’s visibility.
How to track job applications in Excel: Step-by-step
Step 1: Create a workbook with 3 tabs (Applications, Lists, Dashboard)
Set up three sheets:
- Applications — your main table
- Lists — dropdown options (Status, Source, Work Mode)
- Dashboard — pivot tables/charts (optional but recommended)
This keeps your tracker clean and scalable.
Step 2: Add the right columns (start simple, stay consistent)
On the Applications sheet, add these headers in Row 1.
Core columns (recommended for most job seekers)
- Company
- Job Title
- Location
- Work Mode (Remote/Hybrid/On-site)
- Source (LinkedIn, Indeed, Referral, Company site, Recruiter, etc.)
- Job URL
- Date Found
- Date Applied
- Status
- Next Follow-Up Date
- Last Contact Date
- Contact Name
- Contact Email/LinkedIn
- Resume Version
- Notes
Optional columns (useful for high-volume applicants)
- Req ID / Posting ID
- Priority (High/Med/Low)
- Stage Detail (Screen, Tech, Onsite, Final)
- Interview Date
- Comp (Posted)
- Outcome (Offer/Rejected/Closed)
- Reason Lost (Pay, role fit, location, etc.)
Now convert this into an Excel Table:
- Select your header row and a few blank rows below
- Press Ctrl + T (Windows) / Cmd + T (Mac)
- Confirm “My table has headers”
- Name the table
tblApps(Table Design → Table Name)
Tables make filtering, formulas, and dashboards dramatically easier.
Step 3: Add drop-downs to avoid messy data
If your Status column contains “Interview”, “Interviewing”, “interview”, and “Screen”… your reporting will be useless. Use Data Validation lists.
3A) Create Lists
In the Lists sheet:
StatusList
- Interested
- Applied
- Follow-Up Sent
- Recruiter Screen
- Interview
- Offer
- Rejected
- Accepted
- Closed (No response / role removed)
WorkModeList
- Remote
- Hybrid
- On-site
SourceList
- Indeed
- Company Site
- Referral
- Recruiter
- Networking
- Other
Then apply data validation dropdowns using Microsoft’s official method:
https://support.microsoft.com/en-us/office/create-a-drop-down-list-7693307a-59ef-400a-b769-c5402dce407b
Confidence: High
Step 4: Add follow-up automation formulas (so Excel tells you what to do)
Add these columns (if not already):
- Days Since Applied
- Follow-Up Due?
- Overdue?